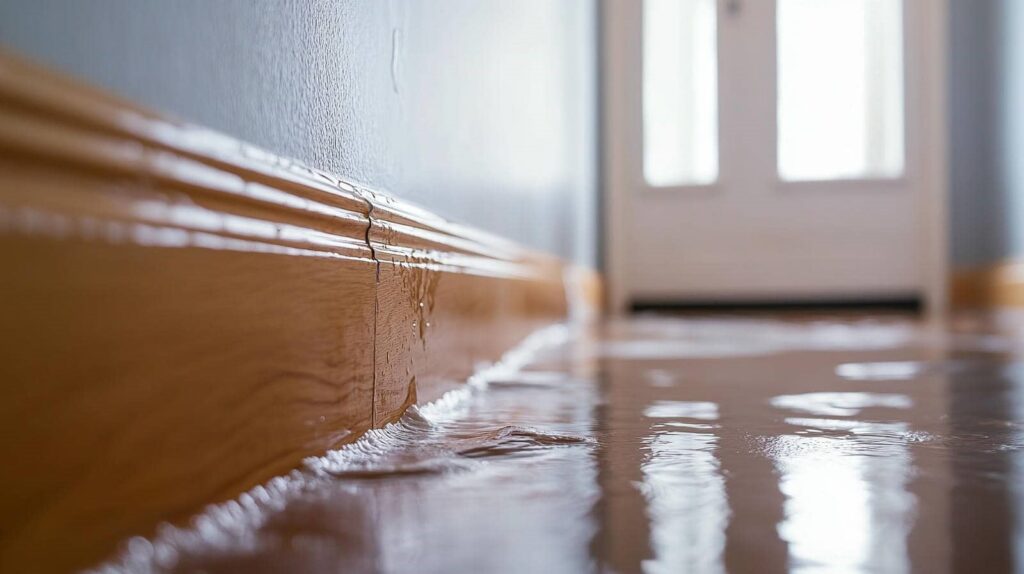
Imagine walking into your basement after a heavy rain and noticing a musty smell along with damp patches on the walls. It’s vital to assess the water damage situation accurately to prevent further damage. By following a systematic approach, you can identify the source of the water intrusion and evaluate its impact. Understanding these seven essential steps can help you take control of the situation and guarantee effective remediation. So, what’s the first step you should take?
Key Takeaways
- Inspect the property thoroughly to identify potential water sources like leaks, burst pipes, and malfunctioning appliances.
- Look for visible signs of water damage, including damp walls, water stains, and mold growth.
- Assess structural integrity by examining foundation stability and using moisture meters for hidden dampness.
- Document all findings meticulously to guide remediation efforts and prioritize affected areas.
- Develop a tailored remediation plan that includes water extraction, drying, and mold prevention strategies.
Identify the Source of Water Damage
Before you can effectively address water damage, it’s vital to pinpoint its source. Start by inspecting your property for potential water sources. Common culprits include leaky roofs, burst pipes, or malfunctioning appliances.
Look for visible signs such as damp walls, water stains, or mold growth, which can indicate underlying water leaks. Don’t forget to check areas like basements and crawl spaces, where moisture often accumulates unnoticed.
Once you’ve identified the specific source, you can initiate targeted repairs, preventing further damage. It’s important to act swiftly, as prolonged exposure to water can lead to structural issues and health risks.
Determine the Severity of Water Intrusion
To determine the severity of water intrusion, you first need to identify the water source and its impact on the surrounding environment.
Next, assess any structural damage by examining walls, floors, and ceilings for signs of compromise.
Finally, evaluate all affected areas to gauge the extent of moisture infiltration and its potential long-term effects.
Identify Water Source
Identifying the water source is essential for evaluating the severity of water intrusion in any affected area. You’ll want to employ various detection methods to pinpoint leaks accurately.
Begin by inspecting visible areas, like plumbing fixtures and appliances, for signs of moisture or damage. If nothing’s apparent, utilize specialized tools such as moisture meters or thermal imaging cameras for deeper leak identification.
Pay attention to hidden spots, like behind walls or under floors, where water may accumulate unnoticed. Once you locate the source, assess the flow rate and volume of water involved.
This information will help determine the urgency of your response and guide your next steps in remediation or repair. Accurate identification is key to effective water damage management.
Assess Structural Damage
Once you’ve pinpointed the water source, the next step is to assess the structural damage caused by the water intrusion.
Begin by examining the foundation stability; any cracks, shifts, or signs of settlement can indicate serious issues.
Pay close attention to load bearing structures, as compromised beams or columns can jeopardize the entire building’s integrity.
Use a moisture meter to identify hidden dampness that may affect structural components.
Document your findings meticulously, noting areas of concern that could lead to further complications.
Engaging a professional for detailed load bearing assessments might be necessary to guarantee safety.
Evaluate Affected Areas
As you begin evaluating affected areas, determining the severity of water intrusion is essential for effective remediation.
Start by inspecting surfaces for water stains, which indicate where moisture has penetrated. Pay close attention to ceilings, walls, and floors, as these areas can reveal the extent of damage.
Next, assess the potential for mold growth, especially in damp, dark corners. If you spot any discoloration or a musty odor, take it seriously, as mold can spread rapidly and pose health risks.
Measure moisture levels with a hygrometer to quantify the intrusion’s impact.
How to Check Materials and Structures for Water Damage?
To assess materials and structures for water damage, start with a thorough visual inspection, looking for signs like discoloration or warping.
Next, use a moisture meter to quantify the extent of moisture content in affected areas, ensuring you identify hidden issues.
Finally, analyze the structural integrity to determine if any components need immediate repair or replacement.
Visual Inspection Techniques
While evaluating for water damage, a thorough visual inspection is essential to identify affected materials and structures.
Start by looking for visual clues such as discoloration, stains, or warping on walls, ceilings, and floors. Pay close attention to areas around windows, doors, and plumbing fixtures, as they’re often vulnerable.
Use inspection techniques like checking for soft spots or crumbling materials, which indicate potential structural compromise. Don’t forget to inspect hidden areas, such as behind appliances or under sinks, where moisture can accumulate unnoticed.
Document your findings meticulously, as this information will guide further assessment. Engaging with fellow professionals during this process fosters a sense of community and shared expertise, enhancing your overall water damage assessment skills.
Moisture Meter Usage
Following a thorough visual inspection, utilizing a moisture meter allows for a more precise evaluation of materials and structures for water damage.
Start by selecting the appropriate moisture meter types—pin-type for invasive measurements and pinless for surface readings. Confirm your device is properly calibrated to guarantee accurate results.
When checking surfaces, move the meter slowly across the material, noting any fluctuations in readings that indicate moisture presence. For deeper assessments, insert the pins into the material, being mindful of the meter’s depth capabilities.
Document your findings meticulously, as these measurements will support your overall assessment. By employing moisture meters effectively, you’ll enhance your ability to diagnose water damage accurately, fostering a sense of belonging within your professional community.
Structural Integrity Analysis
As you assess the structural integrity of materials and structures affected by water damage, it’s essential to inspect various components methodically.
Start with a thorough visual examination, looking for signs of warping, discoloration, or mold growth. Pay particular attention to foundation stability; check for cracks or settlement issues that may compromise the entire structure.
Next, perform a load bearing analysis on beams and columns, guaranteeing they can support the weight above without risk of failure. Utilize moisture meters to identify hidden dampness within walls and flooring.
Document all findings meticulously, as this data will guide necessary repairs and help prevent future complications.
Use Tools to Measure Moisture Levels in Water-Damaged Areas
Measuring moisture levels in water-damaged areas is vital for effective assessment and remediation. To accurately gauge the extent of water intrusion, you’ll need to use moisture detection techniques like pin-type and pinless moisture meters.
Pin-type meters penetrate surfaces, giving you direct moisture readings, while pinless models utilize electromagnetic signals to assess moisture content without causing damage.
It’s important to check various materials, such as drywall, wood, and flooring, to identify hidden moisture pockets that can lead to mold growth.
Additionally, employing proper water extraction methods guarantees that you remove excess moisture efficiently.
Document Your Findings for Insurance Claims
After evaluating moisture levels and identifying the extent of water damage, it’s important to document your findings meticulously for insurance claims. Proper claim documentation supports your case and guarantees you receive the compensation you deserve.
Focus on thorough evidence collection by including:
- Photos of affected areas, highlighting damage and moisture levels
- Detailed descriptions of the damage, including dates and specific locations
- Records of any communications with contractors or insurance representatives
This documentation serves as a vital reference for your insurance adjuster, making it easier to assess your claim.
Develop a Remediation Plan
To effectively address water damage, you’ll need to develop a thorough remediation plan that outlines the specific steps required to restore your property.
Start by identifying the extent of the damage and creating a list of remediation strategies tailored to your situation. This may include water extraction, drying, and mold prevention techniques.
Assign responsibilities and establish restoration timelines to guarantee the project stays on track. Prioritize tasks based on severity and potential hazards, ensuring safety throughout the process.
You’ll also want to factor in necessary materials and equipment to streamline the remediation efforts.
Consult Professionals for Comprehensive Evaluation
Once you’ve developed a remediation plan, it’s important to consult professionals for a thorough evaluation of the damage.
A professional assessment guarantees you address all underlying issues that mightn’t be visible to the untrained eye. Expert consultation can save you time and money by providing insights into:
- Hidden Moisture: Professionals use advanced tools to detect moisture levels that could lead to mold growth.
- Structural Integrity: Evaluating the strength of affected structures helps prevent future hazards.
- Health Risks: Experts assess potential health risks associated with contaminants in water-damaged areas.
Investing in a professional evaluation not only confirms your remediation plan’s effectiveness but also reinforces your commitment to maintaining a safe environment for everyone involved.
Frequently Asked Questions
How Long Does Water Damage Assessment Typically Take?
A water damage assessment typically takes one to three hours, depending on assessment factors like the extent of damage, property size, and accessibility. You’ll find thorough evaluations essential for effective restoration planning and execution.
Can I Assess Water Damage Without Professional Help?
Yes, you can assess water damage without professional help. By conducting a DIY assessment, you’ll inspect damage indicators like discoloration, mold growth, and moisture levels, helping you understand the extent of the problem effectively.
What Are Common Signs of Hidden Water Damage?
You’ll notice common signs of hidden water damage like mold growth, peeling paint, or water stains. These issues can compromise structural integrity, so it’s essential to investigate further to protect your home and health.
How Often Should I Conduct Water Damage Assessments?
You should conduct water damage assessments at least twice a year, following established frequency guidelines. Consider scheduling them seasonally to catch potential issues early, ensuring your environment remains safe and secure from hidden water threats.
What Should I Do Immediately After Discovering Water Damage?
Immediately assess the situation for safety, then initiate emergency response measures. Document the damage evaluation thoroughly, taking photos and notes. Contact professionals to mitigate further issues and guarantee a thorough understanding of the damage’s extent.
Wrap-Up
In the intricate dance of water and structure, recognizing the signs is your key to restoration. Think of your assessment as a compass guiding you through a flooded landscape; each step leads you closer to clarity. By meticulously documenting your findings and developing a robust remediation plan, you’re not just salvaging materials but reclaiming your space. Trust in the process, as every detail you uncover will illuminate the path to safety and restoration, transforming chaos back into comfort.